
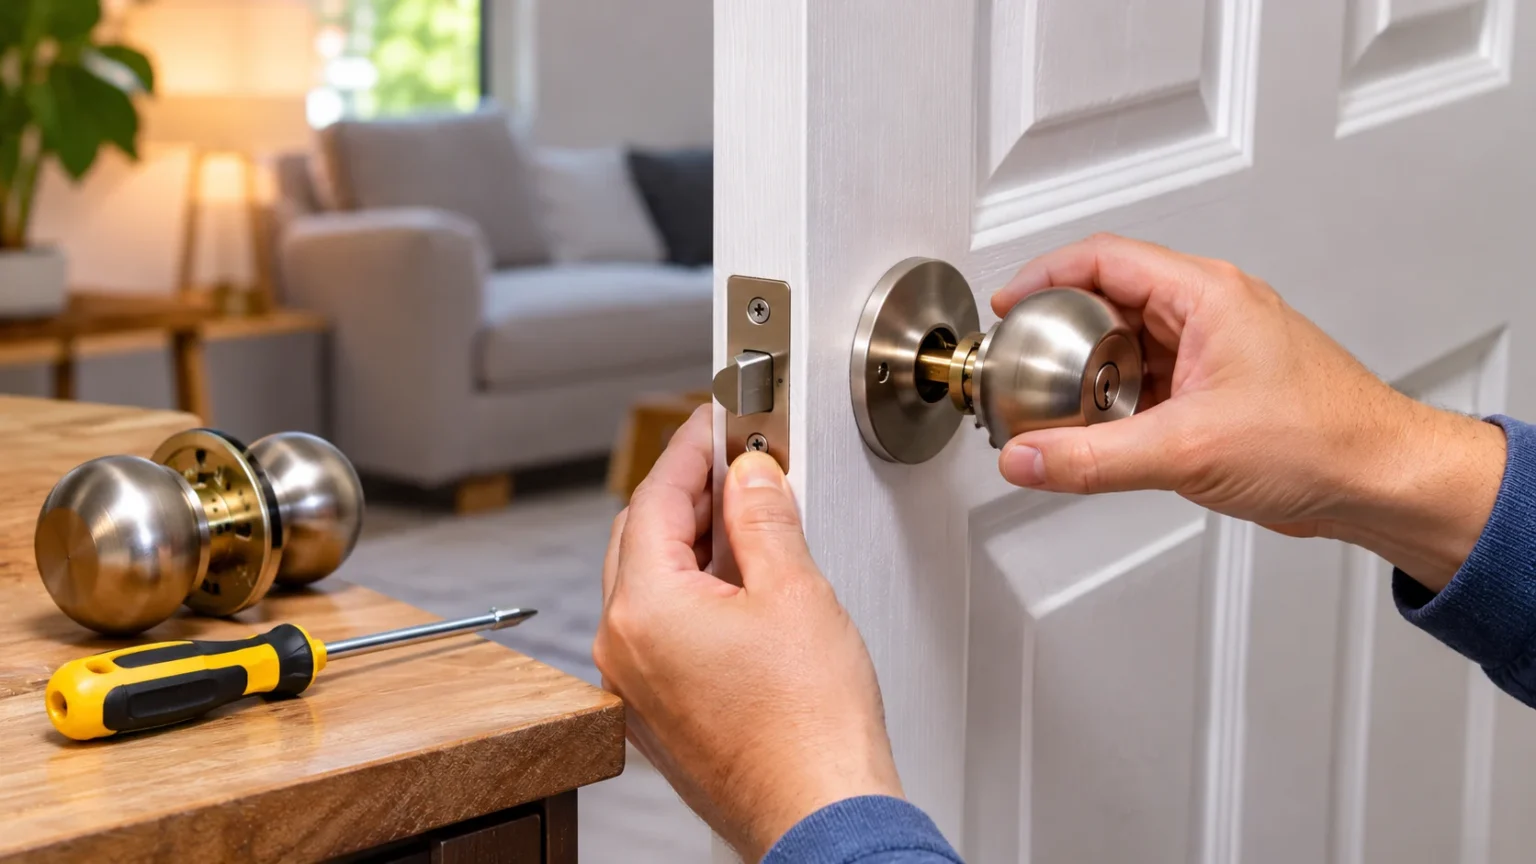
Replacing a door handle is one of the simplest home improvement projects that can improve both the appearance and functionality of your doors. Whether your current handle is loose, damaged, outdated, or difficult to operate, installing a replacement can make everyday use more convenient. Fortunately, most standard interior door handles can be replaced using basic household tools without professional assistance.
Learning how to replace a door handle can also help you save money on minor home repairs. The process usually involves removing the existing hardware, checking the door measurements, installing the new latch, and securing the replacement handle. This guide explains each stage, common installation mistakes, essential tools, and practical maintenance tips to help you achieve a secure and professional-looking result.
Why You Might Need to Replace a Door Handle
Door handles experience regular wear because they are used repeatedly throughout the day. Over time, internal springs, screws, and latch components may loosen or stop functioning properly. A handle that feels unstable, sticks during operation, or fails to retract the latch can become frustrating and may eventually require replacement.
Appearance is another common reason homeowners replace door handles. Older hardware may look worn, scratched, or outdated compared with newly painted doors and modern interior finishes. Installing matching handles throughout your home can create a more consistent appearance while complementing other decorative features, including hinges, cabinet hardware, and lighting fixtures.
Security and accessibility can also influence the decision to replace door hardware. A damaged exterior lockset may not provide reliable protection, while difficult-to-operate handles can create problems for people with limited hand mobility. Choosing appropriate replacement hardware helps ensure that doors operate smoothly and meet the practical needs of household members.
Different Types of Door Handles You Should Know
Before replacing a door handle, it is important to understand the different styles available. Common options include round doorknobs, lever handles, privacy handles, passage handles, and keyed entry handles. Each design serves a particular purpose, and selecting the correct type helps prevent compatibility problems during installation.
Passage handles are generally used on doors that do not require locking, such as closets and hallways. Privacy handles commonly appear on bedrooms and bathrooms because they include a simple locking mechanism. Keyed entry handles are typically installed on exterior doors or other locations where controlled access is necessary.
Lever handles are popular in modern homes because they are often easier to operate than traditional round knobs. However, handle appearance should not be the only consideration when choosing replacement hardware. Door thickness, latch dimensions, lock functions, and installation requirements must also match the existing door configuration.
Tools and Materials Needed to Replace a Door Handle
Most standard door handle replacements require only a few basic tools. A suitable screwdriver is usually the most important item because it removes mounting screws and secures the replacement hardware. Depending on the handle design, you may also need a small flathead screwdriver, measuring tape, and a suitable tool for releasing concealed mounting mechanisms.
Many replacement door handle kits include the latch assembly, strike plate, mounting screws, and connecting hardware. Before beginning, check the package contents against the manufacturer’s installation instructions. Having all necessary components available helps prevent interruptions and ensures that the new hardware can be installed correctly.
Additional supplies, such as a soft cloth and mild cleaning solution, can help remove dust and marks around the existing handle. A pencil may also be useful for marking measurements or alignment points. Avoid modifying the door unnecessarily, especially when the replacement hardware is already compatible with the existing openings.
How to Choose the Right Replacement Door Handle
Choosing the correct replacement begins with identifying the existing handle’s function and dimensions. A bedroom privacy handle should generally be replaced with hardware offering the same appropriate function, while an exterior entry door requires a suitable locking system. Selecting compatible hardware makes installation easier and helps maintain the door’s intended purpose.
Measure the door thickness and the distance from the door edge to the center of the handle opening. This distance is called the backset and commonly measures either 2⅜ inches or 2¾ inches on many US residential doors. Some replacement latch assemblies are adjustable, while others require a specific measurement.
Consider the handle’s finish, shape, and installation instructions before purchasing. Popular finishes include satin nickel, matte black, polished chrome, and oil-rubbed bronze. Choose a design that complements your interior while offering suitable durability, comfortable operation, and compatibility with the door’s existing preparation.
How to Remove an Old Door Handle
Begin by opening the door and keeping it securely positioned so it cannot swing unexpectedly. Locate the screws holding the existing door handle in place, which are often found on the interior side. Some handles have visible mounting screws, while others use concealed fasteners hidden beneath a decorative cover or trim plate.
Use the appropriate screwdriver to loosen the mounting screws while supporting both sides of the handle. Once the screws are removed, carefully separate the interior and exterior handle components. If the handle does not release easily, check for hidden fasteners or a manufacturer-specific release mechanism rather than applying excessive force.
After removing the handle, inspect the opening and surrounding door surface for damage. Clean away dust, dirt, and loose debris before installing the new hardware. Keeping the original components organized can be useful when comparing measurements or identifying how the replacement handle should fit.
How to Remove the Existing Door Latch
The latch is the mechanism that extends from the door edge and engages with the strike plate on the door frame. After removing the handles, locate the latch faceplate along the edge of the door. Most standard latch assemblies are secured with two screws that can be removed using a screwdriver.
Carefully loosen the screws and slide the latch assembly out of the door edge. If it feels stuck, gently check for paint buildup or other obstructions around the faceplate. Avoid using excessive force because this could damage the door’s finish or enlarge the existing hardware opening.
Once removed, compare the original latch with the replacement component. Check the length, faceplate shape, and position of the latch opening. These details help determine whether the new latch will fit properly without requiring additional modifications to the door.
How to Install a New Door Latch
Begin installing the replacement latch by checking its orientation according to the manufacturer’s instructions. For a typical spring latch, the beveled side should face the strike plate so the door can close smoothly. Certain latch designs have adjustable or reversible components, so follow the instructions supplied with your specific hardware.
Slide the latch into the existing opening along the door edge. Make sure the latch faceplate sits evenly against the surface and aligns with the screw holes. If the replacement uses an adjustable backset, confirm that it matches the door’s existing measurement before securing the latch.
Insert the supplied mounting screws and tighten them carefully until the faceplate sits securely. Avoid overtightening because excessive pressure can damage screw holes or affect latch alignment. Test the latch movement before installing the handle to confirm that it extends and retracts without sticking.
How to Install the New Door Handle
Once the latch is secured, position the exterior handle component according to the manufacturer’s instructions. The spindle or connecting mechanism should pass through the correct opening in the latch assembly. Proper alignment is essential because the spindle operates the latch whenever the handle is turned or pressed.
Next, position the interior handle component on the opposite side of the door. Align the mounting holes and connecting parts before inserting the supplied screws. Hold both handle sections steady while tightening the screws gradually, alternating between them when appropriate to maintain even alignment.
After securing the hardware, operate the handle several times with the door open. The latch should retract smoothly and return to its extended position when released. If the mechanism feels stiff or does not function correctly, recheck the alignment and installation instructions before closing the door.
How to Replace a Door Handle With Hidden Screws
Some modern door handles use concealed mounting systems to create a cleaner appearance. These designs often hide screws behind decorative trim plates or release mechanisms. Before attempting removal, inspect the handle for a small opening, release slot, or removable cover that provides access to the mounting hardware.
Follow the manufacturer’s release method to remove the decorative components without damaging the finish. Certain handles use a spring-loaded release mechanism, while others feature a removable rose or cover plate. Using an unsuitable tool or applying excessive pressure can scratch the hardware or damage the door.
Once the concealed fasteners are accessible, the replacement process is similar to installing a standard handle. Remove the old components, verify latch compatibility, and install the new hardware according to the instructions. Carefully reattach decorative covers after testing the handle to ensure everything operates correctly.
How to Replace an Exterior Door Handle
Replacing an exterior door handle requires additional attention because entry hardware contributes to home security. Identify whether the door uses a separate deadbolt, an integrated lockset, or another locking arrangement. Choose replacement hardware designed for the same configuration and suitable for exterior residential use.
Before removing the existing hardware, ensure the door is open and that you have another reliable way to secure the property if necessary. Follow the manufacturer’s instructions when removing the handle and installing the new locking mechanism. Avoid unnecessary changes to the door preparation because exterior lock components require accurate alignment.
After installation, test the handle and lock repeatedly while the door remains open. Confirm that the latch and locking mechanism operate correctly before testing the door in the closed position. If the new lock does not align securely with the strike plate or functions inconsistently, consider professional assistance.
How to Replace a Bathroom or Bedroom Door Handle
Bathroom and bedroom doors commonly use privacy handles that include a simple locking feature. These handles are designed to provide privacy rather than the security of a keyed exterior lock. When selecting replacement hardware, choose a compatible privacy function that matches the door’s existing installation requirements.
Remove the original handle and latch using the same general process as a standard interior handle replacement. Install the new latch and handle components while following the manufacturer’s orientation instructions. Privacy handles may have additional connecting parts that operate the locking mechanism, making careful assembly especially important.
Once installed, test the locking and unlocking functions with the door open. Confirm that the emergency release feature operates as intended, particularly on bathroom doors. A properly functioning privacy handle should provide convenient locking without creating unnecessary difficulties when access is required.
Common Door Handle Installation Mistakes
One common mistake is purchasing a replacement handle without measuring the existing door preparation. Incorrect backset measurements or incompatible door thickness requirements can prevent the hardware from fitting properly. Checking the manufacturer’s specifications before purchasing helps avoid unnecessary returns and modifications.
Another mistake involves installing the latch in the wrong orientation. If the latch is reversed or poorly aligned, the door may not close smoothly or the handle may feel difficult to operate. Reviewing the installation instructions and testing the mechanism with the door open can help identify this problem early.
Overtightening screws is another issue that can affect installation quality. Excessive pressure may damage mounting holes, distort trim components, or interfere with smooth handle movement. Tighten screws evenly and securely, but avoid forcing hardware beyond the manufacturer’s recommended installation requirements.
How to Fix a Door Handle That Does Not Work Properly
If the replacement door handle feels loose, begin by checking whether the mounting screws are properly secured. Loose hardware can shift during operation and prevent the internal components from engaging correctly. Tightening the screws carefully may restore stability without requiring additional repairs.
A handle that turns without retracting the latch may indicate an incorrectly positioned spindle or connecting mechanism. Open the door and inspect the assembly according to the manufacturer’s instructions. Repositioning the components correctly can often solve the problem when the replacement hardware is otherwise compatible.
If the door does not latch when closed, examine the alignment between the latch and strike plate. Changes in door position, hinge condition, or frame alignment can affect proper engagement. Minor adjustments may be possible, but significant misalignment or damage should be evaluated before making permanent modifications.
How Long Does It Take to Replace a Door Handle?
Replacing a standard interior door handle often takes approximately 15 to 30 minutes when the new hardware matches the existing door preparation. The process is generally straightforward because most compatible replacement sets use established mounting locations. However, actual installation time depends on the handle design, door condition, and experience of the person performing the work.
Handles with concealed fasteners, unusual latch mechanisms, or incompatible measurements may require additional time. Removing paint buildup or dealing with damaged screw holes can also complicate the project. Reading the manufacturer’s instructions before starting helps reduce confusion and makes the installation process more efficient.
Exterior locksets and specialized hardware may require greater care because proper alignment and security are important. When the replacement involves substantial door modifications or complex locking mechanisms, professional installation may be worthwhile. Choosing compatible hardware is often the easiest way to minimize installation time and avoid unnecessary complications.
How Much Does It Cost to Replace a Door Handle?
Door handle replacement costs depend on the type, finish, brand, and security features of the hardware. In the United States, basic interior door handles may cost approximately $10 to $40, while premium decorative designs can cost considerably more. Exterior locking handles often carry higher prices because of their additional components and security requirements.
Professional installation adds labor costs, which vary according to location and project complexity. A straightforward handle replacement may be relatively inexpensive, while specialized hardware or door repairs can increase the total expense. Homeowners should compare the cost of compatible replacement parts with professional service charges before deciding how to proceed.
Replacing the handle yourself can reduce labor expenses when the project involves basic interior hardware and no major modifications. However, cost savings should not come at the expense of proper operation or security. For complicated entry locks, damaged doors, or unfamiliar mechanisms, professional assistance may provide better long-term value.
How to Maintain a Door Handle After Replacement
Regular cleaning helps keep replacement door handles looking attractive and functioning properly. Wipe the surface with a soft cloth and use a mild cleaning product approved for the hardware finish. Avoid harsh abrasive cleaners because they can scratch protective coatings and reduce the appearance of polished or decorative surfaces.
Inspect the handle periodically for loose screws, unusual movement, or difficulty operating the latch. Addressing minor problems early can prevent unnecessary wear on internal components. If the mechanism becomes stiff, follow the manufacturer’s maintenance recommendations rather than applying random lubricants that may attract dust or damage materials.
Proper door alignment also contributes to the lifespan of replacement hardware. A door that rubs against its frame or requires excessive force to close can place additional stress on the latch. Keeping hinges secure and ensuring smooth operation can help maintain comfortable everyday use while reducing avoidable hardware problems.
Conclusion
Learning how to replace a door handle is a useful home maintenance skill that can improve convenience, appearance, and everyday functionality. Most standard interior handle replacements involve removing the existing hardware, checking compatibility, and installing the new latch and handle assembly. With suitable tools and careful attention to instructions, many homeowners can complete the project without major difficulties.
The key to a successful replacement is selecting hardware that matches the door’s measurements and intended function. Backset, door thickness, latch design, and mounting requirements should all be checked before purchasing. Taking time to verify these details reduces installation problems and helps ensure that the replacement operates smoothly.
Whether you are updating bedroom hardware, replacing a bathroom privacy handle, or repairing an exterior entry handle, proper installation matters. Test the mechanism carefully, maintain the hardware regularly, and seek professional assistance when security or structural problems are involved. A correctly installed door handle can provide reliable operation and complement your home’s overall appearance for years.
Frequently Asked Questions
Can I Replace a Door Handle Myself?
Yes, many standard interior door handles can be replaced using a screwdriver and compatible hardware. The process is usually straightforward when the replacement matches the existing door measurements and mounting configuration.
Do All Door Handles Fit the Same Doors?
No, door handles differ in backset, door thickness compatibility, latch design, and mounting requirements. Always measure your existing door and check the replacement manufacturer’s specifications before purchasing.
How Long Does It Take to Change a Door Handle?
A basic interior door handle replacement often takes approximately 15 to 30 minutes. Concealed fasteners, damaged hardware, unusual door preparations, or more complex locking mechanisms may require additional time.
Can You Replace a Door Handle Without Changing the Latch?
Sometimes, compatible handles can be installed using an existing latch assembly. However, compatibility must be verified, and replacing both components is often preferable when the original latch is worn or damaged.
Why Is My New Door Handle Not Latching Properly?
Common causes include incorrect latch orientation, spindle misalignment, loose mounting screws, or strike plate positioning. Inspect the installation with the door open and correct any problems before relying on the latch.