
Walls and ceilings play a major role in how a room looks and feels. However, small imperfections, uneven surfaces, and damaged drywall can make even a freshly painted space appear unfinished. Orange peel texture is a popular drywall finishing technique that creates a subtle, slightly bumpy surface resembling the skin of an orange. Whether you want to apply this texture evenly or remove it for a smoother appearance, understanding the right materials, preparation methods, and finishing techniques can help you achieve professional-looking results.
What Is Orange Peel Texture and Why Is It Popular?
Orange peel texture is a drywall finish characterized by small, rounded bumps across the surface. It resembles the natural texture found on an orange peel, although the pattern can range from fine to noticeably raised. Contractors commonly apply this finish using specialized spray equipment. The result is a softly textured wall that provides visual interest without creating an overly rough appearance.
Many homeowners prefer orange peel walls because they can make minor surface imperfections less noticeable. Small drywall inconsistencies may become less obvious beneath a consistent textured finish. This makes the technique practical for living rooms, bedrooms, hallways, and ceilings. However, larger cracks, damaged joints, and uneven repairs still require proper preparation before texture application.
Another advantage is the flexibility of the finished appearance. Fine orange peel texture can look subtle under neutral paint, while heavier patterns create greater visual depth. The finish works with many interior design styles, from traditional to contemporary. Understanding its characteristics helps homeowners decide whether to maintain the texture or replace it with a smooth drywall finish.
Understanding Different Types of Orange Peel Texture
Orange peel texture comes in several variations depending on the application method and material consistency. Fine orange peel creates small, closely spaced bumps that are less noticeable from a distance. This finish is often selected for modern residential interiors. Its understated appearance allows wall colors, furniture, and decorative features to remain the main visual focus.
Medium orange peel texture produces a more noticeable pattern with slightly larger surface variations. It can help disguise minor drywall finishing differences while maintaining a relatively clean appearance. Many existing residential walls feature this level of texture. Matching it during repairs requires attention to spray technique, material consistency, and the appearance of surrounding surfaces.
Heavy orange peel texture creates larger, more pronounced bumps across walls or ceilings. It can add visual character but may also make rooms appear busier, especially under directional lighting. Unlike knockdown texture, orange peel is generally left rounded rather than flattened after spraying. Recognizing these differences helps homeowners select the correct technique when applying or matching existing finishes.
Tools and Materials Needed for a Smooth Orange Peel Finish
Achieving consistent orange peel texture begins with selecting suitable tools and materials. Common supplies include drywall joint compound, a texture sprayer, mixing equipment, masking materials, and appropriate protective equipment. Some smaller projects can use aerosol texture products designed for repairs. The right application method depends on the surface area, desired pattern, and manufacturer’s instructions.
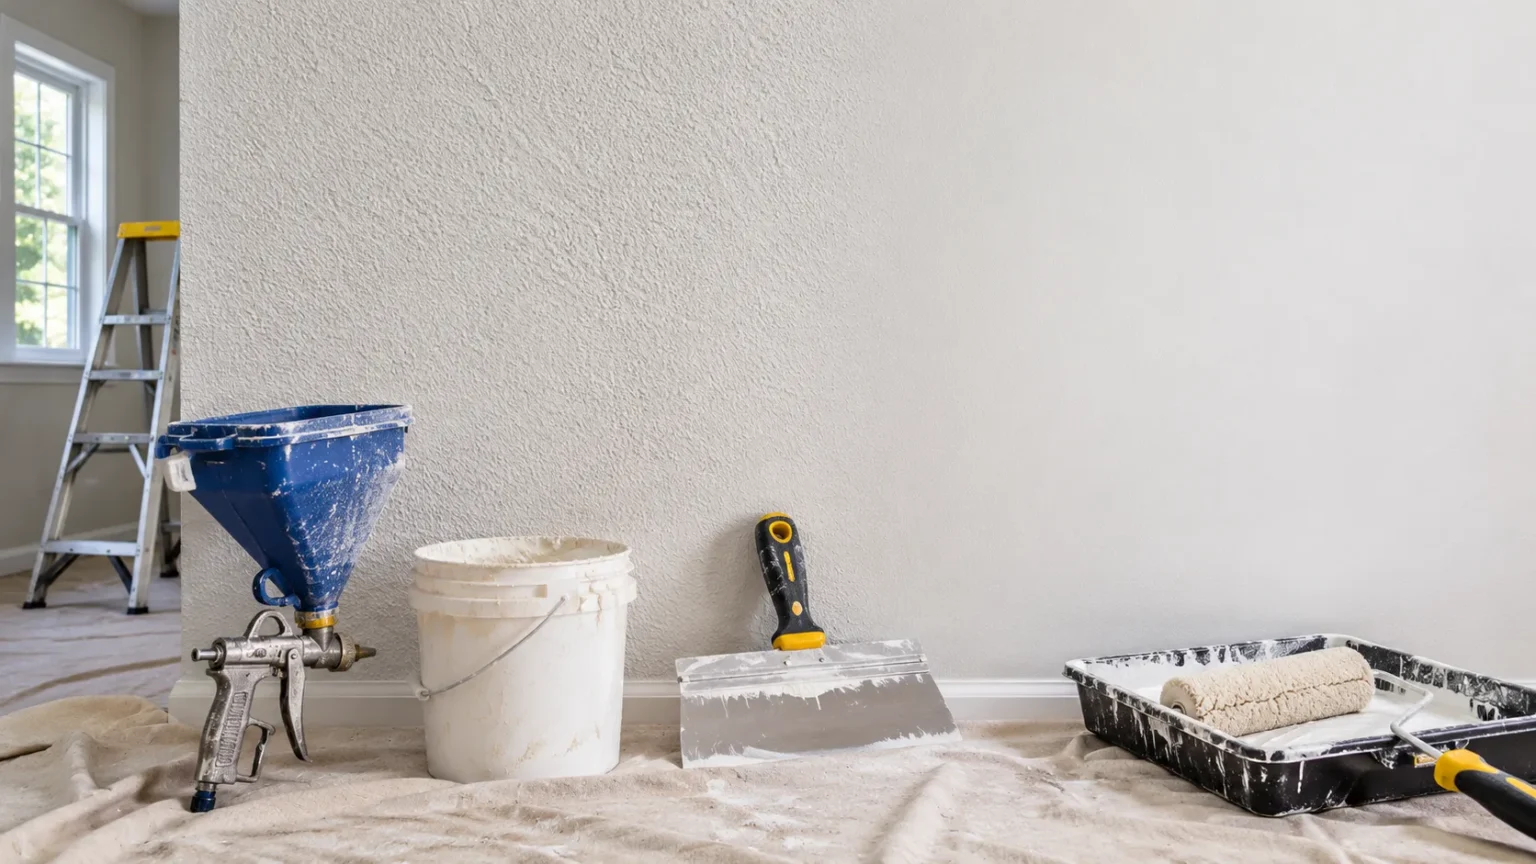
Larger rooms often require a texture hopper gun connected to an appropriately rated air compressor. This equipment allows controlled application across broad wall and ceiling surfaces. Different nozzle sizes and operating settings influence the resulting pattern. Before starting, review the equipment instructions and test the setup on scrap drywall or another suitable practice surface.
Surface preparation also requires basic drywall finishing supplies. Sanding tools, joint compound knives, primer, and cleaning materials help create a suitable foundation. Protective coverings prevent overspray from reaching flooring, furniture, and fixtures. Using compatible products and maintaining a clean workspace makes the project easier to manage while reducing avoidable finishing problems.
Preparing Walls Before Applying Orange Peel Texture
Surface preparation is one of the most important steps in achieving an even drywall finish. Start by inspecting the walls for cracks, dents, loose material, and damaged joints. Repair visible imperfections with appropriate drywall compound and allow it to dry completely. Texture should not be used as a substitute for correcting significant surface damage.
Next, gently smooth repaired areas according to the compound manufacturer’s recommendations. Remove sanding dust with suitable cleaning methods before applying primer or texture. A clean, stable surface helps the finishing materials bond more consistently. On older painted surfaces, particularly those that may contain lead-based paint, arrange appropriate testing before disturbing the coating.
Primer requirements depend on the drywall condition and the selected texture product. New drywall and repaired sections often benefit from compatible priming systems. Follow manufacturer guidance because some textures require a particular application sequence. Proper preparation helps reduce uneven absorption, visible repair patches, and other defects that can affect the final appearance.
How to Apply Orange Peel Texture Evenly
Applying orange peel texture begins with preparing the material according to the product instructions. Premixed textures and drywall compounds may require different handling or dilution methods. Consistency affects how the material leaves the sprayer and forms its pattern. Testing a small sample first helps identify whether the mixture and equipment are producing the desired finish.
During spraying, maintain a consistent application technique across the surface. Uneven movement or changing equipment settings can create noticeable differences in texture density. Follow the sprayer manufacturer’s guidance for positioning and operating settings. Practicing on spare material allows beginners to recognize how changes in technique affect the resulting pattern before working on finished walls.
Apply the texture in controlled sections while watching for excessive buildup or irregular coverage. Avoid repeatedly spraying one area simply to correct small differences while the material remains wet. Instead, evaluate the pattern and follow the product’s recommended correction procedures. Once the finish is complete, allow adequate drying time before applying compatible primer or paint.
How to Make Orange Peel Texture Look Smoother
A fine orange peel texture can create a smoother-looking appearance than a heavy, uneven pattern. Achieving this result depends on applying smaller, more consistent droplets across the surface. Material preparation and spray equipment settings both influence the outcome. Always test adjustments before applying texture to an entire wall or ceiling.
Existing orange peel walls may appear smoother after appropriate cleaning, minor repairs, and repainting. A suitable paint finish can reduce the visual emphasis on surface irregularities. However, paint does not physically remove the raised texture. For a truly flat wall, homeowners generally need additional surface preparation, skim coating, or another approved refinishing method.
Lighting also affects how noticeable orange peel texture appears. Strong directional light can create shadows that emphasize small bumps and uneven repairs. Softer, more evenly distributed lighting may make the finish appear less pronounced. Combining careful texture application with thoughtful paint and lighting choices helps create a cleaner interior appearance without unnecessary reconstruction.
Removing Orange Peel Texture for Smooth Walls
Removing orange peel texture requires a different approach from simply applying a new coat of paint. The goal is to reduce or cover existing surface variations until the wall becomes sufficiently flat. Skim coating is a common method for achieving this appearance. It involves applying a thin, continuous layer of suitable finishing compound over the textured surface.
Before beginning, inspect the existing coating for damage, moisture problems, and loose material. Painted orange peel may require different preparation than an unpainted drywall texture. Older coatings should be evaluated for potentially hazardous materials before sanding or scraping. Addressing these concerns helps prevent unnecessary exposure and supports better adhesion during refinishing.
Some surfaces may need more than one skim coat to achieve a consistent finish. Each layer should dry according to the manufacturer’s instructions before additional work. Proper sanding and priming help prepare the surface for painting. Although the process requires patience, it can create the smooth drywall appearance often preferred in contemporary homes.
Skim Coating Orange Peel Walls Step by Step
Skim coating starts with cleaning the existing wall and repairing damaged sections. Remove loose material and confirm that the surface is stable enough to accept a new finishing layer. Use a compatible joint compound and suitable drywall finishing tools. Follow the product instructions for preparation, application thickness, and drying conditions.
Apply a thin, even layer of compound using controlled finishing strokes. The goal is to fill small depressions without creating unnecessary ridges or excessive buildup. Allow the compound to dry fully before inspecting the surface. Additional coats may be required where the original texture remains visible or the first application has produced uneven areas.
After the final layer dries, smooth remaining imperfections using appropriate dust-control methods. A suitable drywall primer helps create consistent paint absorption across the refinished surface. Inspect the wall under normal room lighting before painting. Rushing the process can leave visible tool marks, uneven patches, or other defects that reduce the quality of the finished wall.
Painting Orange Peel Texture for a Better Finish
Paint selection can significantly influence how orange peel texture appears after finishing. Flat and matte finishes generally reflect less light than glossier coatings. As a result, they often make small surface variations less noticeable. However, durability and cleaning requirements should also guide the choice, especially in kitchens, hallways, and other frequently used spaces.
Before painting, confirm that the texture has dried completely and is ready for the recommended coating system. Some products require priming, while others have different finishing instructions. Use suitable rollers and application techniques to distribute paint consistently. Excessive pressure or uneven coverage can create visible differences across the textured surface.
Selecting the right color can also improve the overall appearance. Soft whites, warm neutrals, and muted shades often create a balanced background for furniture and decorative elements. Darker or highly reflective finishes may emphasize certain surface variations. Testing paint samples under the room’s normal lighting conditions helps homeowners choose a finish that complements the texture.
Common Orange Peel Texture Mistakes to Avoid
One common mistake is applying texture before completing necessary drywall repairs. Uneven joints, damaged corners, and visible cracks can remain noticeable beneath the finished pattern. Texture may soften minor imperfections, but it cannot correct significant construction problems. Preparing the surface properly helps reduce the need for additional repairs after spraying.
Another mistake is skipping the practice stage before using unfamiliar equipment. Changes in material consistency, sprayer settings, and application technique can produce noticeably different patterns. Starting directly on a prominent wall increases the chance of an inconsistent finish. Testing the setup first allows homeowners to evaluate the texture and make appropriate adjustments.
Rushing drying and finishing stages can also affect the final result. Applying paint too early may interfere with proper curing or create uneven absorption. Excessive sanding can damage surrounding surfaces and increase airborne dust. Following product instructions, maintaining suitable ventilation, and using appropriate protective measures help support cleaner, more consistent results.
Matching Orange Peel Texture During Drywall Repairs
Matching an existing orange peel texture can be challenging because no two applications are necessarily identical. Texture patterns depend on material consistency, application equipment, and finishing technique. Even a small repaired area may stand out when its pattern differs from the surrounding wall. Careful observation is important before applying new material.
Small repair projects often use aerosol drywall texture products designed for localized application. These products can be convenient when repairing nail holes, dents, or patched sections. However, the resulting pattern may require testing and adjustment to blend with the original finish. Always follow the manufacturer’s instructions and protect nearby surfaces from overspray.
After the repaired texture dries, appropriate priming and painting help create a more uniform appearance. Touch-up paint may still look different because of changes in sheen, age, or surface absorption. Repainting a larger section can sometimes improve visual consistency. The goal is to make the repair less noticeable while maintaining the wall’s overall finish.
How Much Does Orange Peel Texture Cost?
The cost of orange peel texture depends on the room size, surface condition, materials, and application method. Small repairs generally require fewer supplies than full-room projects. Homeowners may also need to purchase or rent spraying equipment. Comparing the total cost of preparation, texture application, priming, and painting provides a more realistic budget.
Professional installation costs vary according to local labor rates and project complexity. Ceilings, high walls, and difficult access areas may require additional work. Extensive drywall repairs can also increase the final price. Requesting detailed estimates helps homeowners understand whether surface preparation, materials, cleanup, and painting are included in the proposed service.
Removing orange peel texture can involve additional expenses because skim coating requires repeated finishing work. Labor costs may be higher when several coats and extensive surface preparation are necessary. However, a smooth finish may better suit the homeowner’s design preferences. Comparing professional estimates with realistic DIY expenses helps determine the most practical approach.
Orange Peel Texture vs. Smooth Wall Finish
Orange peel texture and smooth drywall finishes offer different visual effects and maintenance considerations. Orange peel provides subtle surface variation that can make minor imperfections less noticeable. Smooth walls create a flat, uninterrupted appearance often associated with modern interiors. Neither option is automatically better because the choice depends on personal preference and room conditions.
Smooth walls typically require more careful drywall finishing to achieve a consistent appearance. Minor dents, repairs, and surface irregularities may be easier to notice, particularly under directional lighting. Orange peel can reduce the visibility of certain imperfections but may be harder to match during repairs. Understanding these tradeoffs helps homeowners choose a finish that suits their expectations.
Maintenance also differs between the two options. Smooth surfaces can be easier to wipe, depending on the paint finish and wall condition. Textured surfaces may collect dust in small surface variations, although fine orange peel is generally easier to maintain than heavier textures. Regular cleaning and timely repairs help preserve either finish.
How to Maintain Orange Peel Textured Walls
Maintaining orange peel walls begins with regular dust removal and gentle cleaning. A soft microfiber cloth or suitable vacuum attachment can help remove surface dust. Avoid excessive rubbing that could damage the paint or raised texture. Cleaning methods should match the wall coating and the manufacturer’s recommendations.
Minor scratches and dents may require patching before repainting. Repairs should match the surrounding texture as closely as possible to avoid obvious differences. Small areas may benefit from carefully selected aerosol products or professional touch-up techniques. Testing repair materials in an inconspicuous location helps reduce the chance of creating a noticeable patch.
Homeowners should also watch for moisture damage, discoloration, or cracks that develop over time. These problems may indicate conditions that need attention beyond simple cosmetic repairs. Addressing the underlying cause before refinishing helps prevent repeated damage. With appropriate maintenance, orange peel walls can remain attractive and functional for many years.
Conclusion
Orange peel texture offers a practical way to create subtle visual interest while making minor drywall imperfections less noticeable. Its rounded surface pattern works with many interior styles and paint colors. Achieving an attractive finish depends on careful preparation, suitable materials, and consistent application. Testing techniques before working on large surfaces helps reduce unnecessary mistakes.
For homeowners who prefer smooth walls, skim coating provides a common approach to covering existing orange peel texture. However, the process requires proper surface assessment, careful finishing, and adequate drying time. Painting alone cannot eliminate raised texture. Understanding the difference between improving textured walls and creating a truly flat surface helps establish realistic project expectations.
Whether applying orange peel texture, matching an existing wall, or removing it completely, prioritize quality preparation and safe working practices. Choose products appropriate for the surface, follow manufacturer instructions, and seek professional help when necessary. With the right approach, walls and ceilings can achieve a cleaner, more consistent appearance that complements the overall interior design.
Frequently Asked Questions
How Do You Make Orange Peel Texture Smooth?
Skim coating is a common way to create smooth walls over orange peel texture. Apply suitable finishing compound in thin layers, allow proper drying, and complete the surface with appropriate sanding, priming, and painting.
Can You Sand Orange Peel Texture to Make It Smooth?
Some orange peel surfaces can be sanded, but sanding alone may not produce a completely flat finish. Skim coating is often more effective, especially on painted surfaces. Check older coatings for hazardous materials before disturbing them.
What Is the Best Paint Finish for Orange Peel Walls?
Flat or matte paint often works well because it reduces light reflections that emphasize surface irregularities. However, washable finishes may be more practical in busy areas where durability and cleaning are important.
Is Orange Peel Texture Outdated?
Orange peel texture is still used in many residential interiors because it offers subtle visual interest and can disguise minor imperfections. Fine applications often suit modern spaces, while smooth walls remain another popular choice.
How Long Does Orange Peel Texture Take to Dry?
Drying time depends on the product, application thickness, temperature, humidity, and ventilation. Some textures dry within several hours, while others require longer. Always follow manufacturer instructions before priming or painting.