
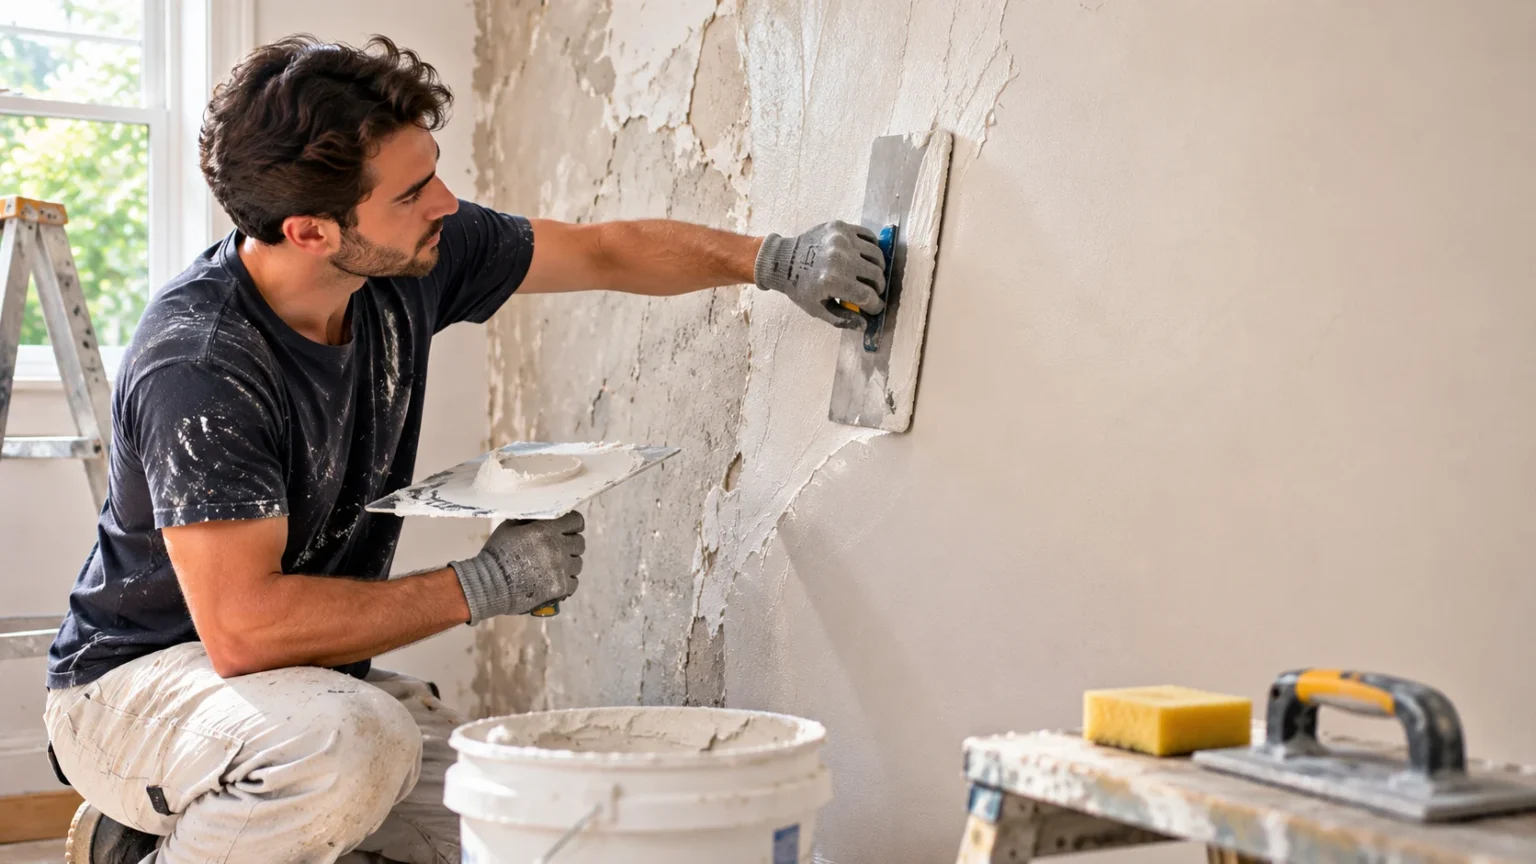
Learning how to replaster a wall can help you restore damaged surfaces, cover imperfections, and give your room a smooth, attractive finish. Over time, plastered walls may develop cracks, uneven patches, peeling sections, or other signs of wear. Replastering can refresh these surfaces and prepare them for painting or decorating without replacing the entire wall.
However, successful replastering requires more than applying a fresh layer of plaster. Poor preparation, incorrect material selection, and improper drying conditions can lead to cracking, bubbling, or weak adhesion. Understanding the correct techniques helps you avoid expensive repairs and achieve longer-lasting results.
Whether you are repairing a small section or refreshing an entire room, careful planning makes the process easier. This guide explains the essential tools, preparation methods, plastering techniques, and common mistakes to avoid. You will also learn when professional assistance may be the safer and more practical choice.
What Does Replastering a Wall Mean?
Replastering a wall involves repairing or replacing an existing plaster surface to create a smooth, stable finish. Depending on the wall’s condition, the process may involve removing damaged plaster, filling deeper defects, or applying a new finishing coat. The purpose is to restore the wall’s appearance and provide a suitable surface for decorating.
There is an important difference between replastering and skimming. Skimming generally involves applying a thin finishing layer over a sound existing surface. Full replastering may require removing loose material and rebuilding the plaster in multiple coats, especially when the original wall has significant damage.
The correct approach depends on the condition of the existing plaster and the underlying wall. Minor surface imperfections may only require patching or skimming, while extensive damage can demand more substantial repairs. Identifying the problem before starting prevents unnecessary work and helps ensure the new plaster remains securely attached.
Signs Your Wall Needs Replastering
Cracks are among the most noticeable signs that a plastered wall may require attention. Small surface cracks sometimes develop because of normal building movement or material shrinkage. However, widening, recurring, or diagonal cracks may indicate underlying structural problems that should be assessed before cosmetic repairs begin.
Loose or hollow-sounding plaster is another common warning sign. When plaster loses adhesion to the background, sections may begin to crumble, bulge, or separate from the wall. Applying fresh plaster over unstable material will not provide a reliable repair because the underlying surface cannot properly support the new coating.
Peeling paint, uneven surfaces, and persistent damp patches may also suggest plaster deterioration. However, moisture damage should never be treated as a purely decorative issue. Leaks, condensation, rising damp, or other moisture sources must be identified and addressed before replastering to reduce the risk of recurring damage.
Tools and Materials Needed to Replaster a Wall
Having suitable tools available before starting makes the replastering process more organized. Essential equipment generally includes a plastering trowel, hawk, mixing bucket, paddle mixer, scraper, and suitable straightedge. A clean sponge, brush, and water supply are also useful for preparation and finishing.
The materials you need depend on the wall’s condition and construction. Common options include finishing plaster, basecoat plaster, compatible bonding products, repair mortar, and reinforcing mesh for suitable applications. Different backgrounds require different products, so always check the manufacturer’s instructions before selecting a plastering system.
Personal protective equipment is equally important during wall preparation and mixing. Safety glasses, suitable gloves, and respiratory protection help reduce exposure to dust and irritating materials. Covering floors and nearby furniture also prevents unnecessary cleanup and protects surrounding surfaces from plaster splashes.
How to Prepare a Wall for Replastering
Proper wall preparation is one of the most important steps when learning how to replaster a wall. Begin by inspecting the existing surface for cracks, loose plaster, moisture, and contamination. Identifying these problems early helps determine whether the wall needs minor preparation, partial repairs, or more extensive replastering.
Remove loose paint, wallpaper, flaking plaster, and other unstable material using appropriate tools. Avoid damaging sound plaster unnecessarily, as this can create additional repair work. If the building is older, check for possible lead-based paint or asbestos-containing materials before disturbing unknown coatings or finishes.
Once the surface is stable, remove dust and debris so the new materials can bond properly. Highly absorbent surfaces may require controlled dampening or a compatible primer, depending on the plaster system. Smooth or low-porosity backgrounds may need specialized bonding treatments to achieve reliable adhesion.
How to Remove Old and Damaged Plaster
Removing damaged plaster creates a sound foundation for the replacement material. Start by identifying areas that are loose, hollow, crumbling, or no longer firmly attached. Small damaged patches may be removed selectively, while widespread failure can require a larger repair area.
Use suitable hand tools carefully to lift unstable sections without unnecessarily damaging the underlying masonry or surrounding sound plaster. Avoid aggressive removal techniques near concealed electrical cables, plumbing, or fragile building components. If extensive demolition is necessary, professional assistance may be appropriate.
After removing damaged material, inspect the exposed background for cracks, moisture, and structural concerns. Loose masonry joints or deteriorated substrates may need suitable repairs before plastering can begin. Cleaning the area thoroughly helps ensure that replacement plaster adheres to a stable and properly prepared surface.
How to Choose the Right Plaster for Your Wall
Choosing the correct plaster depends on the underlying material, environmental conditions, and required finish. Gypsum-based plaster is commonly used for interior surfaces in dry areas because it provides a smooth finish. However, it may not be appropriate for persistently damp locations or certain traditional wall constructions.
Cement-based plaster is often used where greater moisture resistance or durability is needed. Lime plaster is commonly suitable for some older buildings because it can accommodate movement and support moisture management in compatible traditional construction. Selecting materials that match the existing wall helps avoid problems caused by incompatible repairs.
Always review product specifications before applying a new plaster system. Factors such as substrate compatibility, recommended thickness, curing conditions, and finishing requirements can vary considerably. Using unsuitable materials may lead to cracking, poor adhesion, or trapped moisture that damages the surrounding wall.
How to Mix Plaster Correctly
Correct mixing helps plaster achieve a workable consistency and suitable setting characteristics. Begin with a clean mixing bucket and follow the manufacturer’s recommended water-to-powder ratio. Adding excessive water can weaken the mixture, while too little water may make spreading and finishing difficult.
For many gypsum plaster products, the powder is added gradually to clean water before mixing. Use a suitable paddle mixer to achieve an even consistency without dry lumps. Different products may have specific mixing instructions, so avoid assuming the same method applies to every plaster type.
Prepare only as much material as you can apply within the product’s working time. Plaster can begin setting relatively quickly, particularly in warm conditions or when mixed in large quantities. Never attempt to restore setting gypsum plaster by adding more water, as this can compromise its performance.
How to Apply the First Coat of Plaster
Before applying plaster, confirm that the wall is stable, clean, and appropriately prepared. Any required bonding treatment should be used according to the manufacturer’s instructions. The first coat must adhere securely to the background because it forms the foundation for the remaining plaster layers.
Transfer manageable amounts of mixed plaster onto a hawk and load the trowel carefully. Apply the material using controlled, overlapping strokes while maintaining the recommended thickness. Work systematically across the wall to create consistent coverage without leaving large ridges or unfilled areas.
For systems requiring a basecoat, the first layer may need leveling or surface preparation before the next coat. Some traditional applications require scratching the surface to create a mechanical key. Follow the specified plastering system rather than applying universal techniques to materials with different setting requirements.
How to Apply the Finishing Coat
The finishing coat creates the smooth surface that will eventually receive paint or other decoration. Apply the finishing plaster over a compatible prepared base according to the product instructions. Maintaining a consistent layer thickness helps reduce uneven drying and makes the finishing process easier.
Use a clean plastering trowel to spread the material in controlled strokes. Work across the wall in sections while blending adjacent areas before they become difficult to finish. Excessive pressure during early application can drag material away from the surface and produce unwanted marks.
As the plaster begins to firm up, carefully smooth remaining ridges and minor imperfections. The correct timing depends on the plaster type, temperature, and surrounding conditions. Avoid repeatedly working material after it has become too stiff, as this can damage the finish rather than improve it.
How to Get a Smooth Plaster Finish
Achieving a smooth finish requires a combination of suitable materials, correct timing, and consistent trowel technique. Holding the trowel at an appropriate angle helps spread and flatten plaster without removing too much material. Overlapping strokes also reduce visible transitions between neighboring sections.
Small ridges can often be flattened during the appropriate finishing stage. Some plastering systems allow controlled use of water during final troweling, while others have different requirements. Excessive water should be avoided because it may weaken the surface or create an unsuitable finish for subsequent decoration.
Good lighting makes imperfections easier to identify before the plaster fully sets. Checking the wall from different angles can reveal uneven areas that are difficult to notice from directly in front. Patience and careful timing generally produce better results than rushing through the final finishing stages.
How Long Does Replastered Wall Take to Dry?
Plaster drying time varies depending on the material, thickness, ventilation, humidity, and room temperature. A thin gypsum finishing coat may dry within several days under favorable conditions. Thicker basecoats, extensive repairs, or traditional lime plaster systems may require substantially longer periods.
Fresh plaster often changes color as moisture leaves the surface. However, appearance alone does not always confirm that every layer has dried sufficiently. Manufacturer guidance and the conditions of the wall should determine when the surface is ready for decorating or additional treatment.
Avoid forcing the drying process with excessive direct heat. Rapid moisture loss can contribute to cracking, uneven drying, or other surface problems. Gentle ventilation and suitable indoor conditions are generally preferable, although specific curing instructions must be followed for cement-based and lime plaster products.
Common Mistakes to Avoid When Replastering a Wall
Applying plaster over dirty, loose, or contaminated surfaces is a frequent mistake. New plaster may initially appear smooth but later separate from the background because of poor adhesion. Thorough cleaning, suitable repairs, and appropriate bonding preparation help reduce this risk.
Another common problem is mixing plaster incorrectly or applying layers outside the recommended thickness range. Excessively thick applications may crack or fail to cure properly, while overly thin layers may not provide suitable coverage. Following manufacturer instructions helps maintain consistent results throughout the project.
Rushing the finishing and drying stages can also affect the final appearance. Working plaster after it has become too stiff may create rough patches, while painting too early can trap moisture. Allowing sufficient working and drying time helps produce a more durable and attractive surface.
How to Repair Cracks Before Replastering
Cracks should be assessed before applying fresh plaster because their underlying causes influence the repair method. Small, stable surface cracks may be suitable for filling with compatible repair materials. However, widening or recurring cracks may indicate structural movement that requires professional investigation.
Clean the affected area and remove loose material before filling suitable minor cracks. Some repairs benefit from compatible reinforcement mesh or tape, depending on the wall construction and plaster system. Products should be selected carefully to avoid creating rigid patches that are incompatible with flexible traditional materials.
After completing the repair, allow the material to cure or dry according to its instructions. The surrounding surface can then be prepared for skimming or additional plastering where appropriate. Treating the underlying cause is more important than simply covering visible cracks with a new finish.
Can You Replaster Over Existing Plaster?
Replastering over existing plaster is possible when the original surface remains sound, stable, and compatible with the new material. This approach is commonly used for skimming walls that have minor imperfections or outdated surface textures. However, careful preparation is necessary to support reliable adhesion.
Begin by checking for hollow areas, moisture damage, peeling finishes, and unstable sections. Loose plaster should be repaired or removed rather than concealed beneath another layer. The remaining surface may require cleaning, appropriate bonding treatment, or other preparation specified by the selected plaster manufacturer.
Applying fresh plaster over an unsuitable surface can lead to cracking, bubbling, and eventual separation. Existing coatings may also interfere with adhesion if they are glossy, contaminated, or poorly bonded. When the wall’s condition is uncertain, professional assessment can help determine whether skimming or full replacement is more appropriate.
How Much Does It Cost to Replaster a Wall?
The cost of replastering depends on the wall’s size, condition, accessibility, and required repair work. Small patch repairs generally cost less than resurfacing an entire room. Removing damaged plaster, repairing underlying masonry, or managing moisture problems can significantly increase the overall expense.
Labor costs also vary by location and the complexity of the project. Skilled plasterers may charge according to wall area, project duration, or the amount of preparation required. Decorative finishes, difficult corners, and high ceilings may require additional time and specialized techniques.
DIY replastering may reduce labor expenses, but equipment, materials, and potential mistakes should be considered. Beginners sometimes spend more on repairs when large sections require correction. Obtaining several detailed professional estimates can help you compare the cost of doing the work yourself with hiring an experienced plasterer.
DIY Replastering vs. Hiring a Professional
DIY replastering can be practical for small, straightforward repairs when the existing wall is stable and the materials are suitable. It allows homeowners to learn useful maintenance skills while potentially reducing labor costs. However, achieving a consistently smooth finish requires practice, patience, and appropriate preparation.
Professional plasterers bring experience with different substrates, materials, and application techniques. They can often complete larger areas more efficiently and recognize problems that may not be obvious to beginners. Their expertise is especially valuable when working with uneven masonry, extensive damage, or traditional lime plaster.
Consider professional assistance when walls show persistent dampness, significant movement, major delamination, or potential hazardous materials. Large ceilings and difficult-to-access surfaces also introduce additional risks. Choosing professional help for complex situations can prevent repeated repairs and protect the underlying building structure.
How to Paint a Newly Replastered Wall
Painting should begin only after the plaster has dried sufficiently and is suitable for decoration. Applying paint too early can interfere with moisture evaporation and may cause bubbling, peeling, or uneven finishes. The appropriate waiting period depends on the plaster system and environmental conditions.
Once the wall is ready, inspect the surface for dust, minor imperfections, and remaining rough patches. Suitable preparation may include gentle cleaning and limited surface correction. Use a primer or first-coat paint system recommended for new plaster rather than assuming every paint can be applied directly.
Apply paint according to the manufacturer’s coverage and drying instructions. Multiple suitable coats may be required to achieve a consistent appearance. Maintaining adequate ventilation and allowing proper drying between coats helps protect the new plaster finish and improve the overall decorating result.
Conclusion
Understanding how to replaster a wall helps homeowners approach surface repairs with greater confidence. Successful results depend on identifying the underlying problem, preparing the substrate, and choosing compatible plastering materials. Skipping these steps can lead to weak adhesion, cracking, and unnecessary additional work.
The application process also requires careful attention to mixing, layer thickness, finishing techniques, and drying conditions. Following manufacturer instructions helps reduce common mistakes while improving the appearance of the completed wall. Practicing on smaller areas can help beginners develop better control before attempting larger projects.
Although simple repairs may be suitable for DIY work, extensive damage and structural concerns often require professional assistance. Addressing moisture problems and unstable surfaces before plastering is essential for lasting results. With appropriate preparation and patience, replastering can restore damaged walls and create a smooth foundation for future decoration.
Frequently Asked Questions
Can I replaster a wall myself?
Yes, homeowners can replaster small, stable wall sections with appropriate tools and materials. Larger projects require more skill and preparation. Professional help is advisable when walls have extensive damage, moisture problems, or structural concerns.
Do I need to remove old plaster before replastering?
Not always. Sound existing plaster may be suitable for skimming after proper preparation. However, loose, crumbling, moisture-damaged, or poorly bonded material should generally be repaired or removed before applying new plaster.
How long should I wait before painting a replastered wall?
Drying time depends on plaster thickness, product type, and room conditions. Thin gypsum finishes may dry within several days, while thicker or traditional plaster systems can take longer. Follow manufacturer guidance before painting.
What causes new plaster to crack?
New plaster may crack because of rapid drying, incorrect mixing, excessive thickness, poor preparation, or underlying building movement. Identifying the cause is important because simply filling visible cracks may not prevent them from returning.
Is replastering better than replacing drywall?
Replastering can be suitable when the existing wall structure is sound and only the surface needs repair. Drywall replacement may be more practical when boards are severely damaged or the underlying construction requires major work.