
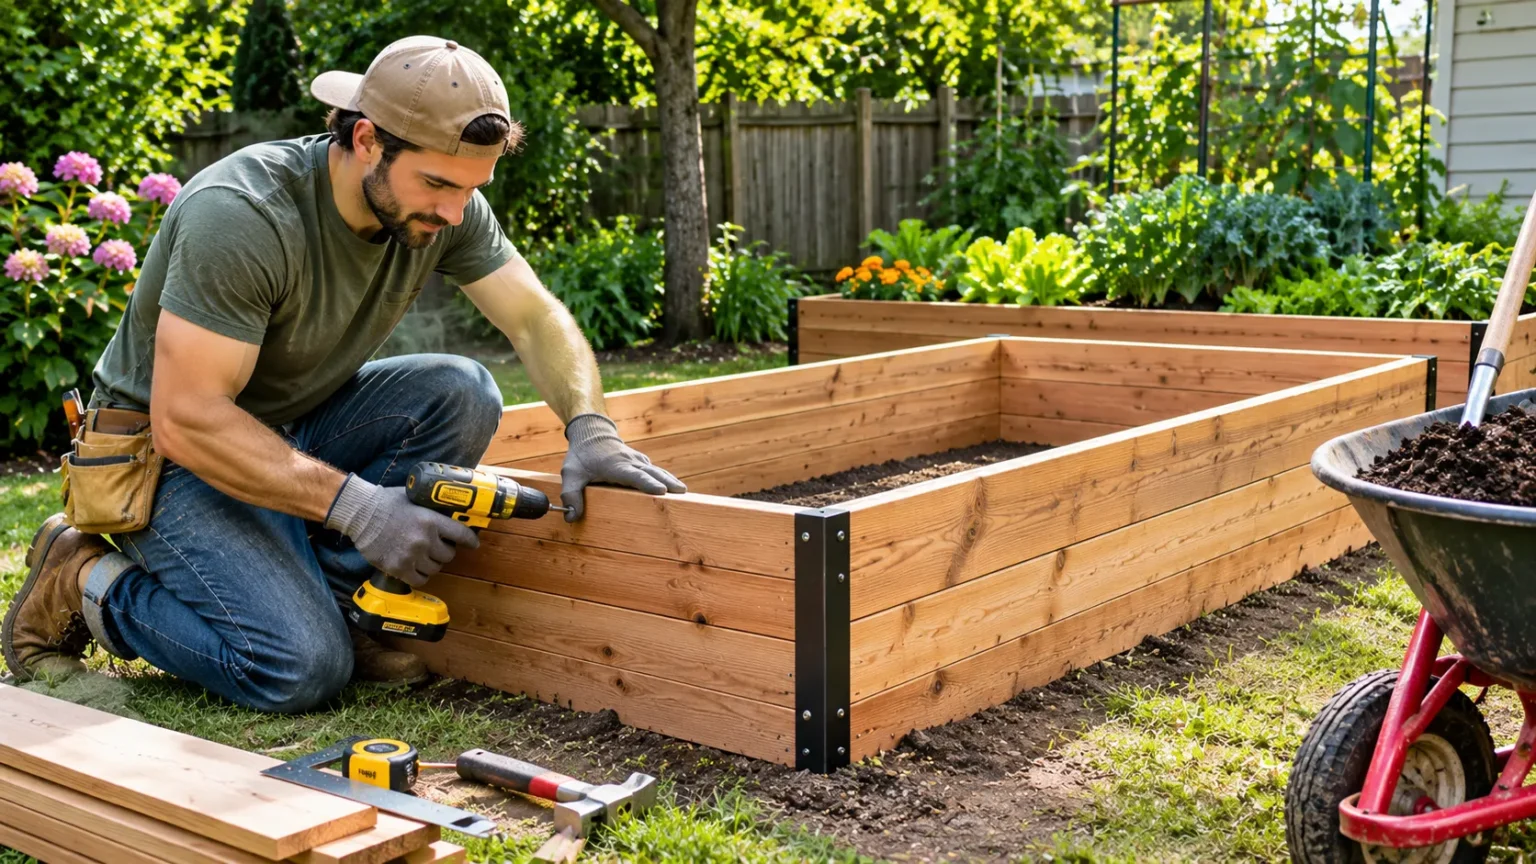
Building a raised garden bed is one of the easiest ways to create an organized and productive growing space. Whether you want fresh vegetables, colorful flowers, or fragrant herbs, raised beds offer a practical solution for home gardening. They provide better control over soil quality, improve access to plants, and make garden maintenance more convenient. Learning how to build a raised garden bed can help beginners start gardening with confidence.
You do not need a large backyard or extensive construction experience to create a simple raised bed. With suitable materials, careful planning, and basic gardening supplies, you can build a growing area that meets your needs. This step-by-step guide explains how to choose a location, select materials, assemble a frame, prepare soil, and maintain a healthy raised garden bed.
What Is a Raised Garden Bed?
A raised garden bed is a growing area built above the surrounding ground level. It usually consists of a wooden, metal, or stone frame filled with suitable gardening soil. Unlike traditional garden plots, raised beds create a defined growing space. This makes planting, watering, and general garden maintenance easier to organize.
Raised garden beds are commonly used for vegetables, herbs, flowers, and small ornamental plants. Their elevated structure allows gardeners to select the soil mixture rather than relying entirely on existing ground conditions. They can also improve access to plants. However, the height and design should match the gardener’s available space and needs.
These beds come in different shapes, dimensions, and construction styles. Some are shallow structures placed directly on the ground, while others are taller and designed for easier access. The most suitable design depends on available materials, gardening goals, and budget. Beginners often start with a simple rectangular bed.
Benefits of Building a Raised Garden Bed
One major benefit of raised bed gardening is improved control over growing conditions. Gardeners can select suitable soil, add compost, and manage drainage more easily. This is particularly useful when existing garden soil is compacted or unsuitable for certain plants. Better soil management can support healthy root development.
Raised beds can also make garden organization more convenient. Their defined edges help separate growing areas from surrounding pathways. Gardeners can arrange vegetables, flowers, and herbs in designated sections. This organized approach may simplify weeding, watering, and routine plant care throughout the growing season.
Another advantage is the flexibility of raised garden bed designs. They can fit small backyards, patios, and other suitable outdoor spaces. Taller beds may reduce the amount of bending required during gardening, although their accessibility depends on construction. Choosing appropriate dimensions helps create a practical growing area.
Step 1: Choose the Best Location for Your Raised Garden Bed
Selecting the right location is an important first step when building a raised garden bed. Most vegetables grow best in areas receiving approximately six to eight hours of direct sunlight daily. However, certain leafy greens and shade-tolerant plants can grow with less. The ideal location depends on what you plan to grow.
Observe your outdoor space at different times of the day before choosing a permanent position. Nearby buildings, trees, and fences may create shade that changes throughout the growing season. Consider whether the area experiences strong winds or excessive afternoon heat. These conditions can influence plant growth and watering requirements.
Access to water is another important consideration. Placing a raised bed near a suitable water source can make regular maintenance more convenient. The surrounding ground should also provide stable support and appropriate drainage. Avoid locations where water regularly collects after rainfall or irrigation.
Step 2: Decide on the Right Raised Bed Size and Height
Raised garden beds can be built in many sizes, but beginners often choose simple rectangular designs. A width of approximately three to four feet allows many gardeners to reach plants from either side. This reduces the need to step onto the growing soil. The length can be adjusted according to available space.
The height depends on the plants, soil conditions, and gardener’s preferences. Beds approximately six to twelve inches deep can support many shallow-rooted crops when suitable soil exists underneath. Taller structures provide additional growing depth. Deep-rooted vegetables may require more space for healthy root development.
Before construction, mark the proposed dimensions using string or another temporary guide. Check whether you can comfortably reach the center without stepping inside the bed. Leave enough room around the structure for walking and carrying gardening supplies. Thoughtful measurements help prevent unnecessary adjustments after assembly.
Step 3: Gather the Materials and Tools You Need
The materials needed for a raised garden bed depend on the chosen design. A basic wooden structure may require suitable lumber, exterior-rated screws, and optional corner supports. You will also need a measuring tape and a way to confirm that the frame is level. Selecting appropriate materials improves stability.
Common construction tools include a screwdriver, drill, saw, and measuring equipment. Beginners can simplify the project by purchasing pre-cut boards or using a ready-made raised bed kit. Adults should handle power tools and cutting tasks according to safety instructions. Protective equipment may be necessary during construction.
Additional gardening supplies include cardboard for suitable ground preparation, quality soil, compost, and mulch. If drainage conditions require attention, plan for those needs before filling the structure. Gathering materials in advance helps make the project more organized. It also reduces interruptions during the building process.
Step 4: Choose the Best Material for Your Garden Bed
Wood is a popular material for raised garden beds because it is widely available and easy to customize. Cedar and other naturally durable woods are common choices for outdoor gardening structures. Their lifespan depends on climate, moisture exposure, and construction quality. Wood also creates a natural appearance that suits many gardens.
Metal raised beds are another option for gardeners who prefer a different appearance or a ready-made structure. Suitable galvanized steel products can provide durable frames when designed for gardening use. However, metal surfaces may become hot in strong sunlight. Consider local temperatures and the manufacturer’s recommendations before choosing.
Stone, brick, and concrete blocks can also create raised garden beds. These materials provide different decorative possibilities but may require more preparation because of their weight. Choose materials intended for appropriate outdoor use. When growing edible plants, avoid materials with uncertain chemical treatments or contamination risks.
Step 5: Prepare the Ground Before Construction
Preparing the ground helps create a stable foundation for your raised garden bed. Begin by clearing the selected area of unwanted materials, large stones, and excessive vegetation. Check that the surface can support the proposed structure. A relatively level base helps keep the frame stable.
If the bed will sit directly on healthy garden soil, maintaining contact with the ground can support drainage and deeper root growth. Many gardeners place plain, uncoated cardboard over existing grass to suppress vegetation temporarily. Remove tape, labels, and plastic coatings before using cardboard. Avoid placing impermeable plastic beneath the growing area.
Some locations require additional preparation because of poor soil conditions or persistent weeds. If the underlying soil may be contaminated, a suitable barrier or fully contained growing system may be necessary. Local gardening guidance can help identify safe options. Proper preparation supports healthier growing conditions and easier maintenance.
Step 6: Assemble the Raised Garden Bed Frame
Begin assembling the frame after confirming the desired dimensions and preparing the materials. Arrange the boards or other structural components according to the planned shape. Check their alignment before securing the corners. A simple rectangular frame is often the most straightforward option for first-time builders.
For wooden beds, pre-cut boards can be connected using suitable exterior screws and corner supports. Follow the hardware manufacturer’s instructions to ensure the joints are secure. Adults should perform drilling and other tool-based construction tasks safely. Check that the structure remains stable as the sections are connected.
Once assembled, place the frame in its intended position and inspect the overall alignment. Confirm that the corners are secure and the structure does not move excessively. Taller beds may require additional reinforcement depending on their design. A stable frame helps prevent soil pressure from affecting the structure over time.
Step 7: Prepare the Raised Bed for Proper Drainage
Drainage is essential because plant roots need both moisture and access to air. Raised beds placed directly on suitable ground usually allow excess water to move into the soil beneath them. However, drainage performance depends on the underlying conditions. Heavy clay or compacted ground may require additional consideration.
Avoid placing an impermeable plastic sheet across the bottom of an ordinary ground-level raised bed. This can prevent water from draining naturally and contribute to overly wet soil. Elevated planters with solid bottoms need suitable drainage openings. Their design differs from open-bottom raised beds.
A well-structured soil mixture also supports healthy drainage. Organic matter and suitable mineral components help create a growing environment that holds moisture without remaining constantly saturated. Avoid adding a thick layer of gravel simply to improve drainage. Proper soil selection and outlet design are generally more effective.
Step 8: Fill the Raised Garden Bed With Quality Soil
Choosing the right soil is one of the most important steps in creating a productive raised bed. A suitable growing mixture should provide nutrients, retain appropriate moisture, and allow excess water to drain. Many gardeners use a quality raised bed soil blend containing compost and suitable mineral components. The ideal mixture depends on the plants.
Compost contributes organic matter and can improve soil structure. However, using excessive amounts of rich compost may create nutrient imbalances or other growing problems. Follow recommendations for the selected soil blend rather than filling the entire bed with compost alone. A balanced growing medium supports healthy roots.
Fill the bed gradually and distribute the soil evenly across the growing area. Allow room near the top for watering and a suitable mulch layer. The soil may settle after watering or rainfall. Check the final depth before planting and add more appropriate growing medium if necessary.
Step 9: Choose the Best Plants for Your Raised Bed
Raised beds can support many vegetables, herbs, and flowers when growing conditions are suitable. Beginners often start with lettuce, radishes, spinach, basil, or other relatively manageable plants. Tomatoes and peppers are also popular choices in appropriate climates. Always consider sunlight, soil depth, and seasonal temperatures.
Plant selection should reflect the available space and expected mature size. Some crops grow compactly, while others spread across a larger area or require vertical support. Crowded planting can reduce airflow and create unnecessary competition. Reviewing seed packets or plant labels helps determine suitable spacing.
You can also create a mixed raised bed containing vegetables and flowering plants. Suitable flowers may attract pollinators and add color to the growing area. However, not every plant combination has the same requirements. Grouping plants with compatible light, moisture, and soil needs makes maintenance easier.
Step 10: Plant Seeds and Seedlings Correctly
Once the soil is prepared, you can begin planting seeds or young plants. Different crops require different planting depths and spacing. Follow the instructions provided with seed packets or nursery plants. Planting too deeply or too closely can affect germination and growth.
For seeds, create suitable planting spaces and cover them with the recommended amount of soil. Water gently to avoid disturbing the newly planted seeds. Keep the growing medium appropriately moist during germination. Avoid flooding the bed because excessive water can displace seeds and reduce available air.
When transplanting seedlings, handle their roots carefully and position them at an appropriate depth. Some plants have special planting requirements, so follow species-specific recommendations. Gently settle the soil around each transplant without excessive compaction. Water afterward to help establish contact between roots and the surrounding growing medium.
Step 11: Water and Mulch Your Raised Garden Bed
Regular watering helps maintain suitable moisture for developing plants. Raised beds may dry faster than traditional garden plots, particularly during hot or windy weather. However, watering needs depend on soil composition, plant type, and climate. Check moisture below the surface rather than relying on a fixed schedule.
Watering near the soil surface can direct moisture toward the root zone. A watering can, suitable hose attachment, or drip irrigation system can provide controlled application. Avoid repeatedly soaking soil that is already wet. The goal is to maintain appropriate moisture without creating waterlogged conditions.
Mulch can help reduce evaporation and limit unwanted weed growth. Suitable organic materials include clean straw, shredded leaves, and other appropriate gardening mulches. Apply a moderate layer while keeping it away from direct contact with plant stems. Mulching also helps protect the soil surface from heavy rain.
Step 12: Maintain Your Raised Garden Bed Throughout the Year
Routine maintenance keeps a raised garden bed productive and easier to manage. Check soil moisture regularly and remove weeds before they spread extensively. Observe leaves and stems for signs of pests, disease, or nutrient problems. Identifying changes early can help prevent more serious damage.
Soil quality may gradually change as plants use nutrients and organic matter decomposes. Adding suitable compost or fertilizer when needed can support future growth. However, excessive fertilization may damage plants or create nutrient imbalances. Soil testing can help guide amendments when gardening problems become persistent.
Seasonal maintenance may include removing spent plants, refreshing mulch, and preparing for new crops. Check wooden frames for loose connections or weather-related wear. Clean and store gardening equipment appropriately after use. Regular attention helps extend the useful life of the bed and supports healthier growing conditions.
Conclusion
Learning how to build a raised garden bed is a practical way to create a convenient and organized growing space. The process begins with selecting a suitable location, choosing appropriate dimensions, and gathering reliable construction materials. Preparing the ground and assembling a stable frame provide the foundation. Quality soil and suitable drainage complete the basic structure.
After construction, successful gardening depends on thoughtful planting and consistent care. Choose crops suited to the available sunlight, soil depth, and local growing season. Water according to plant needs and use appropriate mulch to support soil moisture. Regular observation can help identify problems before they become difficult to manage.
Ultimately, a raised garden bed can provide an enjoyable space for growing vegetables, herbs, and flowers. Beginners can start with a small design and expand their gardening activities as confidence develops. Careful planning reduces unnecessary expenses and maintenance challenges. With appropriate construction and ongoing attention, a raised bed can become a useful feature of your home garden.
Frequently Asked Questions (FAQs)
What is the easiest way to build a raised garden bed?
The easiest approach is to use pre-cut wooden boards or a ready-made raised bed kit. Choose a level location, assemble a stable frame, prepare the ground, and fill it with suitable growing soil.
How deep should a raised garden bed be?
Many raised beds are approximately six to twelve inches deep, but suitable depth depends on the plants and underlying soil. Deep-rooted crops and beds placed over hard surfaces may require more growing space.
What should you put at the bottom of a raised garden bed?
For an open-bottom bed on suitable ground, plain cardboard can temporarily suppress grass and weeds. Avoid impermeable plastic that prevents drainage. Contaminated soil or hard surfaces may require a different construction approach.
What is the best soil mixture for raised garden beds?
A quality raised bed soil blend containing suitable mineral components and compost works well for many plants. The mixture should retain adequate moisture while draining excess water and providing a healthy environment for roots.
Is it cheaper to build or buy a raised garden bed?
Building a simple raised bed may cost less when affordable materials and appropriate tools are available. Ready-made kits can save preparation time, while actual costs depend on size, materials, and local prices.